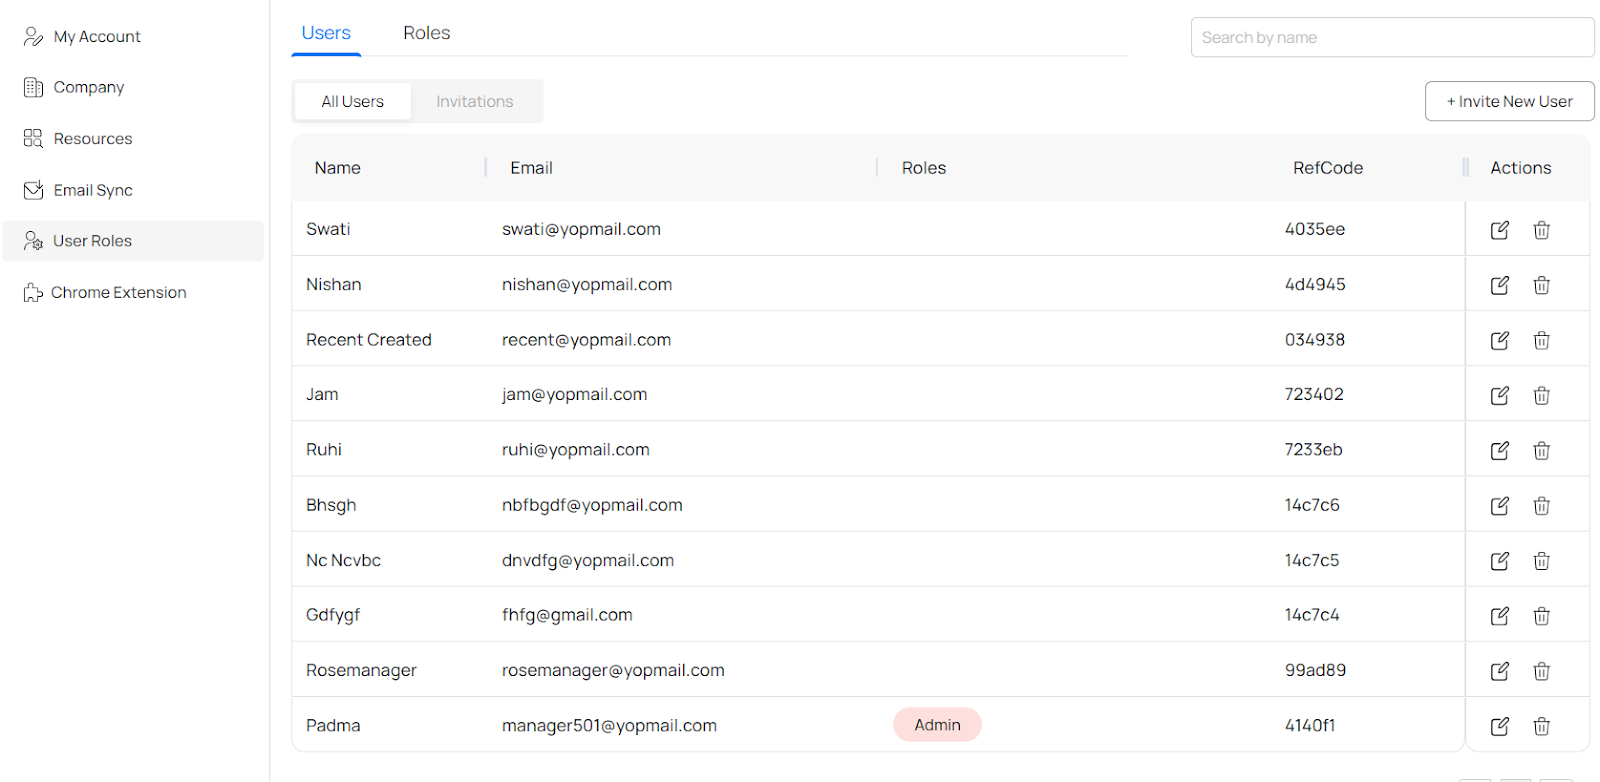
To manage users and their roles within your team members on Pitch N Hire, navigate to the ‘User Roles’ section accessible from the ‘Settings’ option in the left-hand sidebar. The page is divided into 2 sections- ‘Users’ and ‘Roles’.

The ‘Users’ section provides an overview of all users associated with your company’s account, displaying their names, email IDs, roles, and reference codes. Here, you can quickly scan through and manage your current team members, as well as invite new ones or create profiles for them.
Search Bar Functionality

Use the search bar placed near the top right corner to find users quickly by entering a name or email address. This feature is especially useful when you have a large team and need to find individual users’ information without scrolling through the entire list. The search bar is designed to handle partial input, so you can enter a fragment of the name or email, and it will display all related results.
Be as specific as possible to narrow down the search results for a faster find. Use common identifiers like full names or unique parts of an email address to improve search accuracy. Remember that the search bar’s effectiveness depends on the accuracy of the information in the user’s profiles, so keep that data updated.
All Users Section
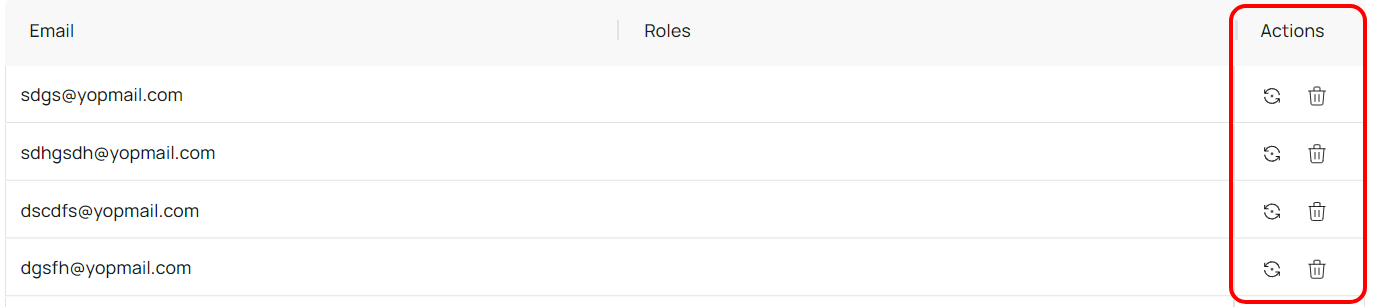
All users’ details are shown in a list format with two quick action buttons on the far right of each user row, titled ‘Actions’. They are as follows:
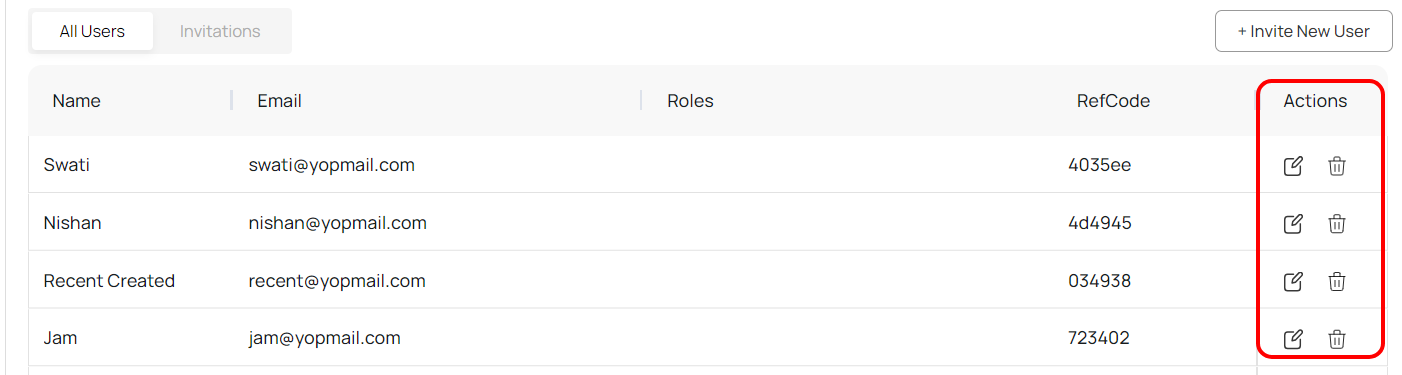
- Edit (left): On each user’s row, there is an icon or option to quickly edit their details and save the changes.
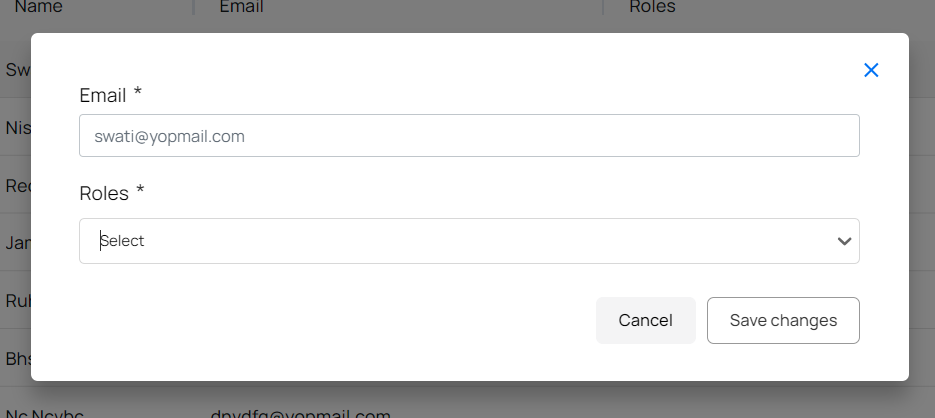
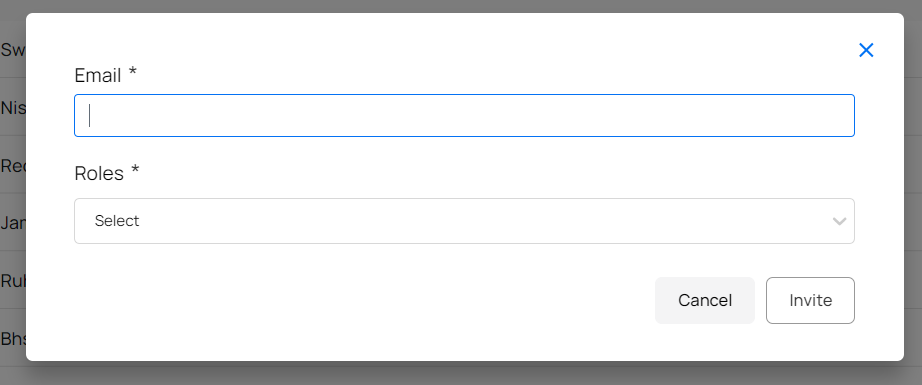
Clicking on the ‘Edit’ icon brings out a pop-up that allows you to edit the user’s email ID and select from a drop-down list of user roles. Once done, click on ‘Save changes’. If you wish to undo the changes, click on ‘Cancel’.
Note: You cannot manually enter a user role in the ‘Role’ field. The role you wish to assign to any user must already be added to the list of user roles on the system. To add new user roles to the platform, follow the steps outlined below.
- Delete (right): Each row also includes a delete option. Use this with caution, as it will remove the user’s profile and access to the Pitch N Hire platform. This action is typically reserved for when a team member leaves the company or no longer requires access to the system.
Pending Invitations Section
If you have sent out invitations to potential team members that have not yet been accepted, these will appear in the ‘Invitations’ section. You will see a list of email IDs and assigned roles for the invitees.
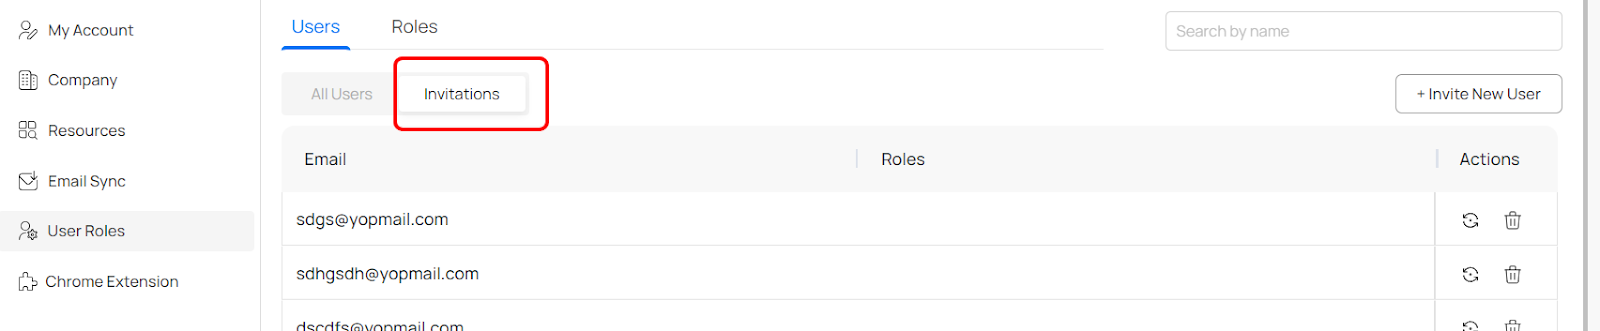
On the far right of each invitee row, under the ‘Actions’ column, you will see two quick action icons:
- Resend Invite (Left): The icon on the left out of the two quick action icons allows you to resend the invite. This is useful if the invitee did not receive or overlooked the original email. Resending can prompt them to take action and join the platform.
- Delete (Right): You can delete a pending invitation if the invite is no longer needed or was sent in error. Deleting an invite will cancel the pending request and remove it from your list.
Inviting New Users

Under ‘All Users’ in the ‘User Roles’ section, you’ll find the ‘+ Invite New User’ button in the top right corner. Here’s how to go about adding a new user:
- Click the ‘+ Invite New User’ button located in the top right corner.
- A popup will appear, prompting you to enter the email address of the person you wish to invite and a drop-down option to select from a list of pre-existing user roles you want to assign to the new user.
- After inputting the email address and choosing from the list of user roles, click ‘Invite’ to extend an invitation to join your team on Pitch N Hire. The invitee will receive an email with instructions on how to join your team.
- Select ‘Cancel’ to discard all changes.
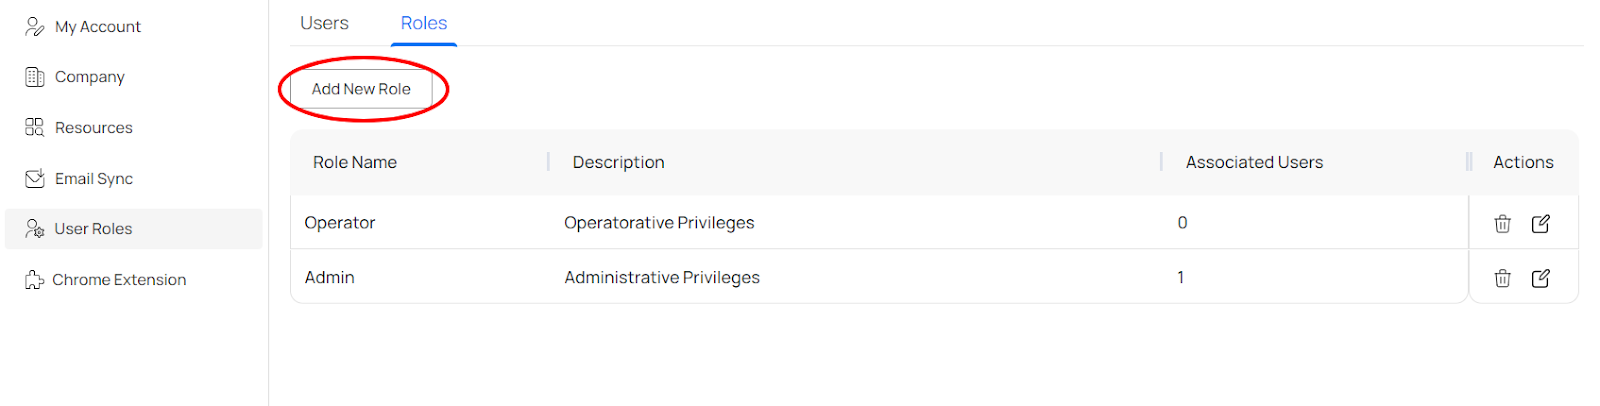
Add New User Roles
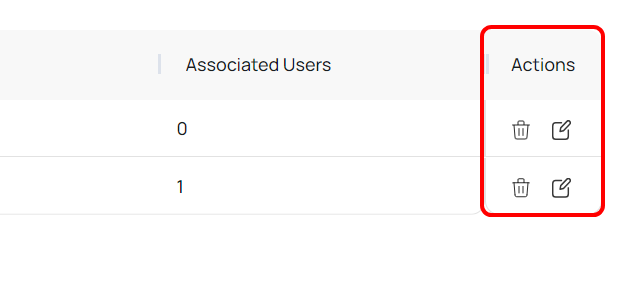
Under the ‘Roles’ section on the ‘User Roles’ page, you will see a list of pre-saved user roles, role descriptions, and the number of associated users mentioned alongside each description.

Delete an Existing Role
On the far right, you will find options to delete or edit each user role, titled under ‘Actions’. The icon on the left allows you to delete the user role.
Add a New Role or Edit an Existing Role
The ‘Edit’ icon on the right of the two quick action icons let you edit the role details. Click on the ‘Edit’ icon and you will find a new section open up with the following details for you to view or edit:
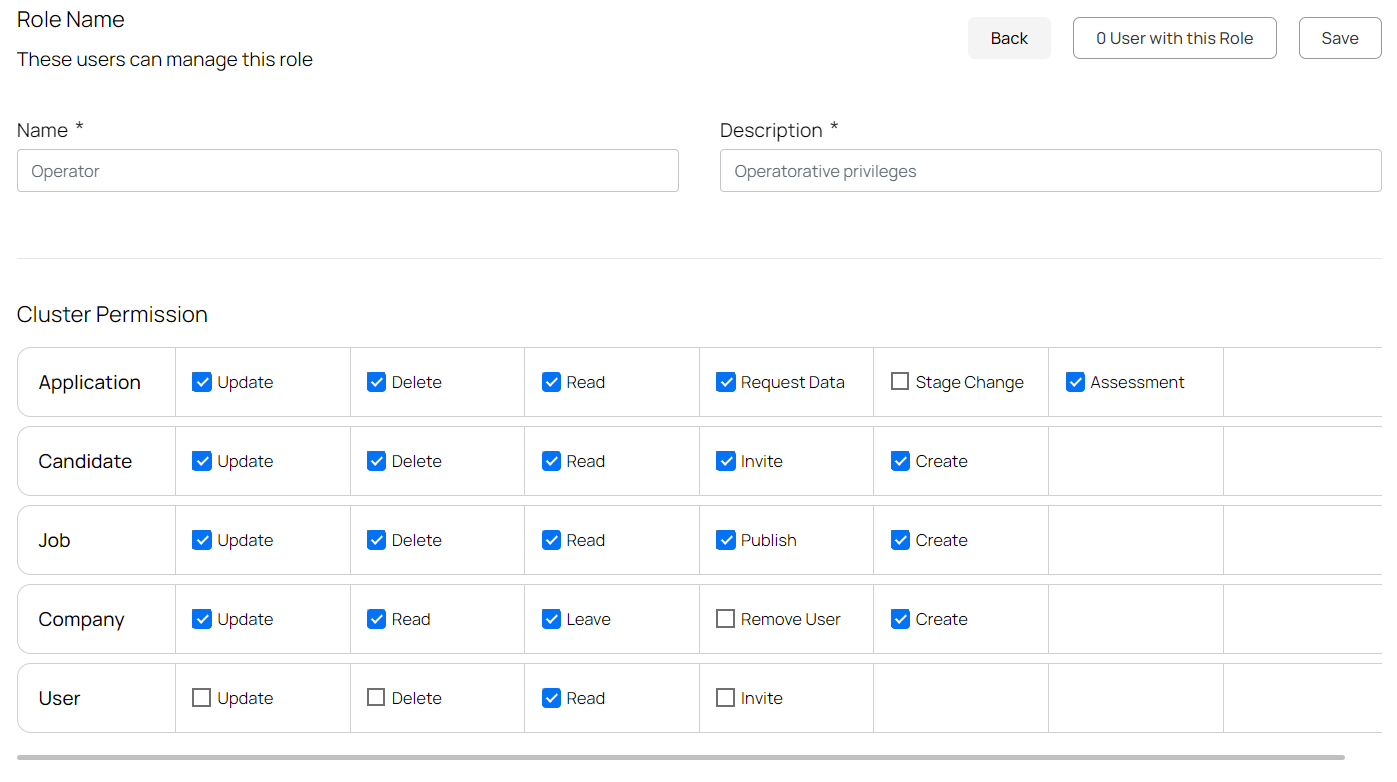
- Name: Here, you can modify the user role name.
- Description: This text field lets you edit the description of the user role.
- Cluster Permissions: Here, you can check or uncheck permissions in clusters. If you wish users with the specific user role to have certain accessibility permissions, check the relevant boxes and leave the rest unchecked.
- Back: Click on this button to discard all changes and go back to the ‘User Roles’ page.
- X User with this Role: This will show the number of users associated with the specific role. The users to whom you attribute the specific role under the ‘All Users’ section shows up under this section. This field is not modifiable from the ‘Roles’ section.
- Save: Once all edits have been made to your satisfaction, click on ‘Save’ to save all changes.
If you wish to add a new user role, click on the ‘Add New Role’ button at the top of the ‘Roles’ page. Clicking on that will open up the same page as the one you will see if you choose ‘Edit’ on each existing user role row.
From there, the steps are just the same as editing an existing user role.